
The other day I sewed my first bralette!
It was something that made me jump with joy, very similar to how I felt when I made my first pair of undies with the pattern “Acacia”.
I spent a lot of time THINKING about making a bralette but I felt super intimidated on how to do it. I’m far from being more than a beginner sewist but I need to make stuff that I’ll use. That’s why, even while I was intimidated by the whole process of making abralette I also REALLY wanted to make one, and perhaps some day a bras with underwire. It’s for that reason that I made underwear before but didn’t make simpler sewing projects. If I want to make things that are useful for me, why would I make projects that I don’t really care about just for practice? If I’m doing an interesting project for me, I have more motivation to do it.
Having said that, there is a big problem: I’m a person that strives very much to be sustainable and I’m also a saver, hence why I was super scared of ruining a beautiful kit that I bought from StudioCosturaShop to make a bralette and some underwear. This made me postpone and procrastinate on this for a long time. “What if I ruin the fabric?”, “What if I cut this the wrong way?”, all these questions were constantly nagging me and I couldn’t let them go.
Until one day I thought: today is the day. Today I’m going to do this. But I’m going to use old t-shirts to practice and I’ll then use a fancier fabric.
And that’s exactly what I did. When I finished I immediately got more confident in my sewing because there’s nothing better to prove yourself that you can do this. And it’s a super comfortable bralette!
Have I said already that I made this?
Choosing a pattern and Barrett Bralette review from a beginner
I decided to use the pattern “Barrett Bralette” by “Madalynne Intimates”, I really like her style and I wanted something without underwire and without many notions, to avoid complicating this too much and this pattern fits all the boxes in terms of that.
The pattern is free and it’s great for people with smaller chests like me, I don’t think that people with bigger chests will like this as the bralette is not very supportive, the elastic is the only thing supporting your boobs.
I want to start by saying that I’m a beginner sewist and maybe people with more experience won’t feel the same way about the pattern.
Honestly, I didn’t think that the pattern instructions were clear enough to make the bralette without any help.
I eventually decided to sign up for CreativeBug and watch Madalynne’s class teaching how to make this bralette.
Small Bobbins‘s videos also helped, it was actually one of the reasons why I chose this model but I still had a few doubts and the class helped a lot to move forward with this project.
I advise you to read the pattern and see if it’s clear to you or not – again I don’t have much experience and that might be the reason why it was hard for me to understand.
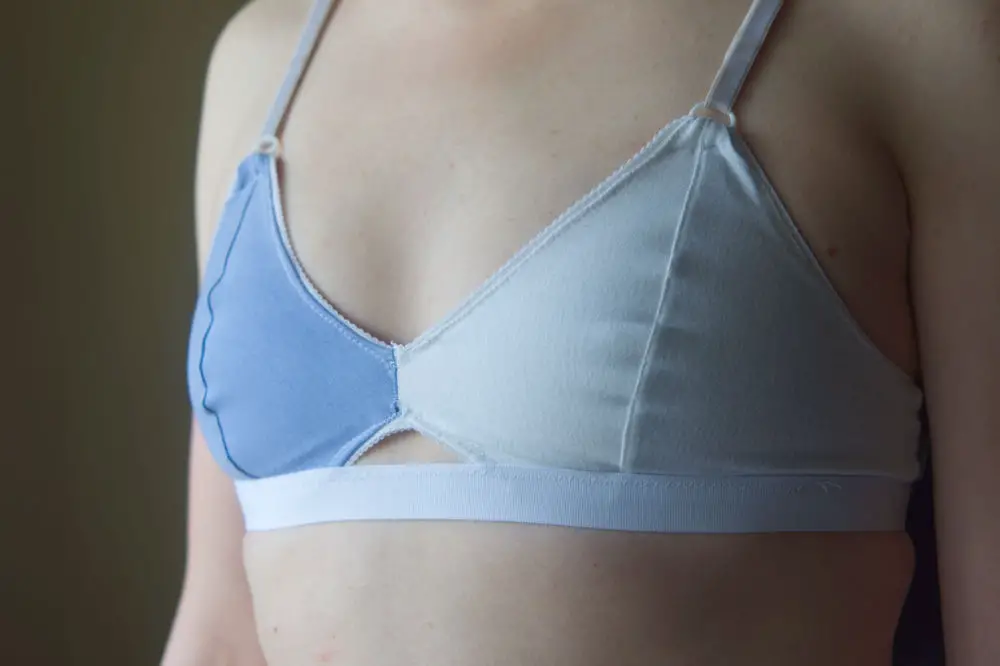
The final result is far from perfect but I’m super super satisfied with it, even with all the wonky lines.
Materials used for the Barrett Bralette
As I said, I used a lot of materials that I already had at home and that was very satisfying for my lower waste self.
Como disse, usei muitos materiais que já tinha em casa o que me deixou bastante satisfeita.
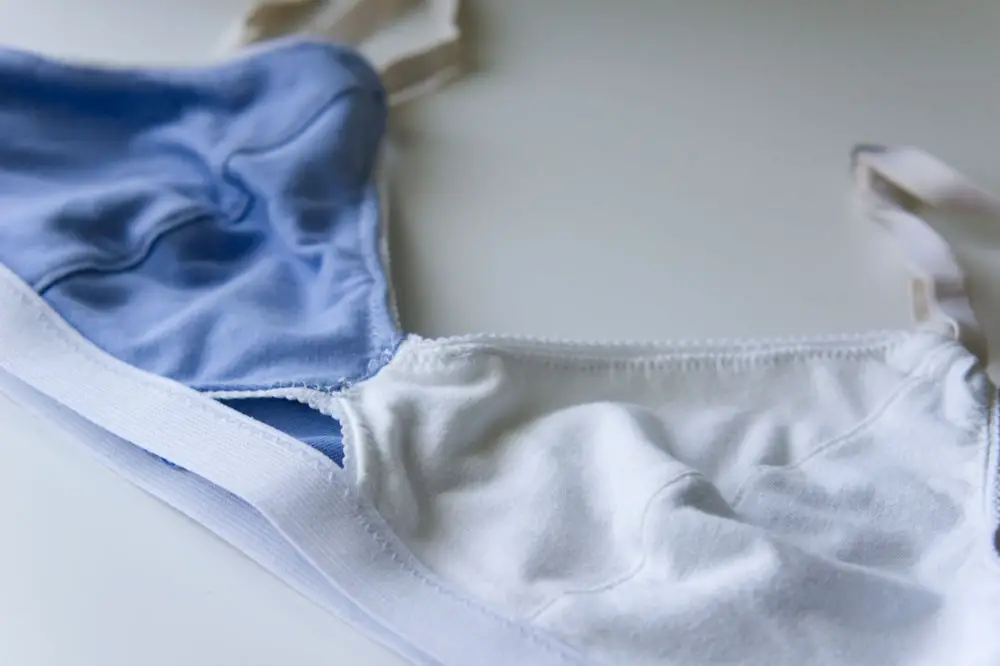
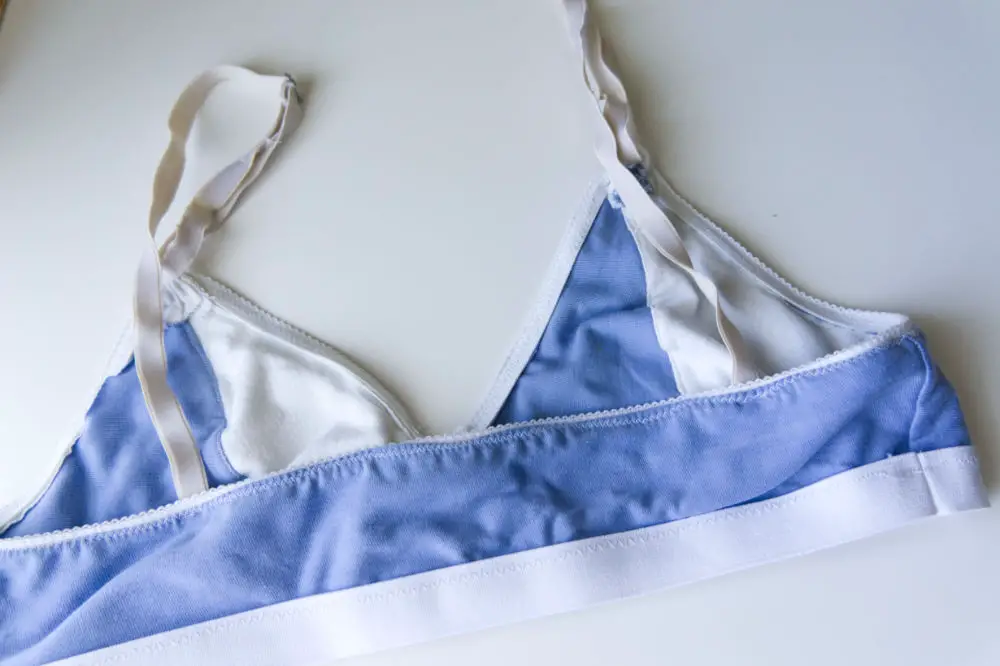
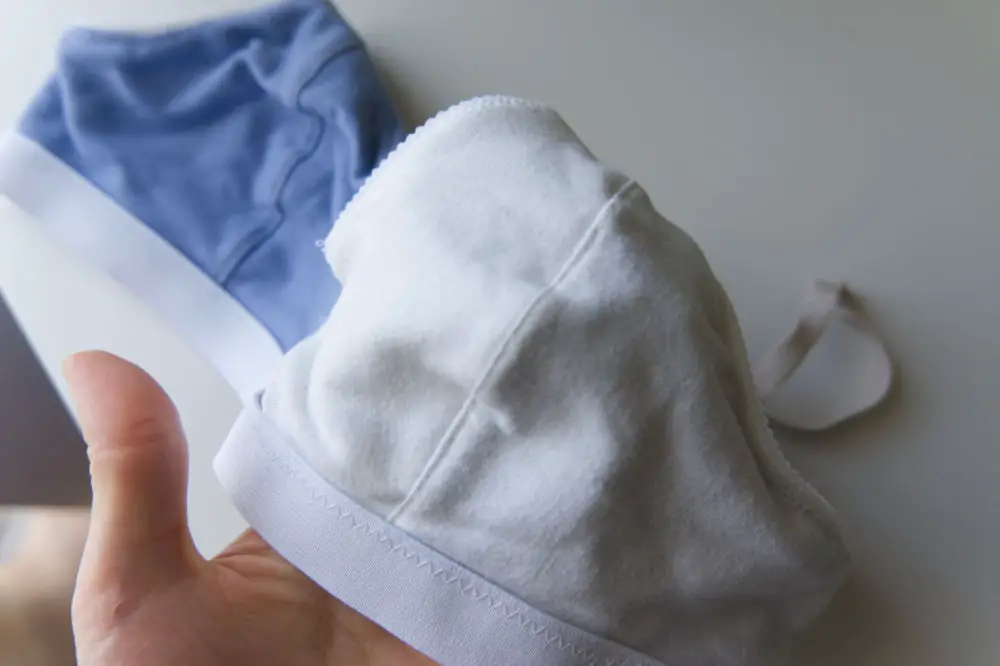
I used two t-shirts, one for each color because I thought it might be fun to do, having two different colors on the cups. One of the t-shirts belonged to my boyfriend and it was getting too worn out but it has a special meaning in my heart because he used it a lot when we first started dating.
I didn’t buy the glue spray (Odif’s spray) that is recommended but still optional, it could have helped in a few things but I try to avoid buying stuff that I won’t use often. Reduce.
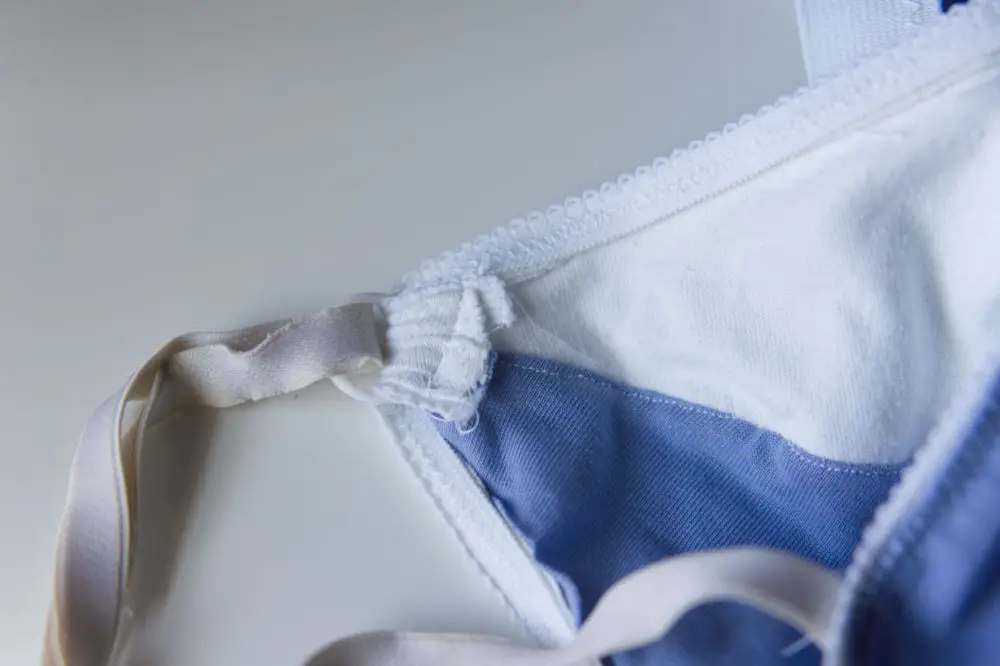
For the straps, I decided to retire a old bra that really needed to be retired but stayed in the drawer for some reason. The straps are obviously more worn out and a little bit yellowy from their age but for this experiment nothing more was needed!
Depois para as alças, decidi reformar um soutien que já precisava mas que continuava na minha gaveta por alguma razão. As alças claro que estão mais gastas e um bocadinho com uma cor amarelada devido à sua idade mas para esta experiência não precisava de mais nada!
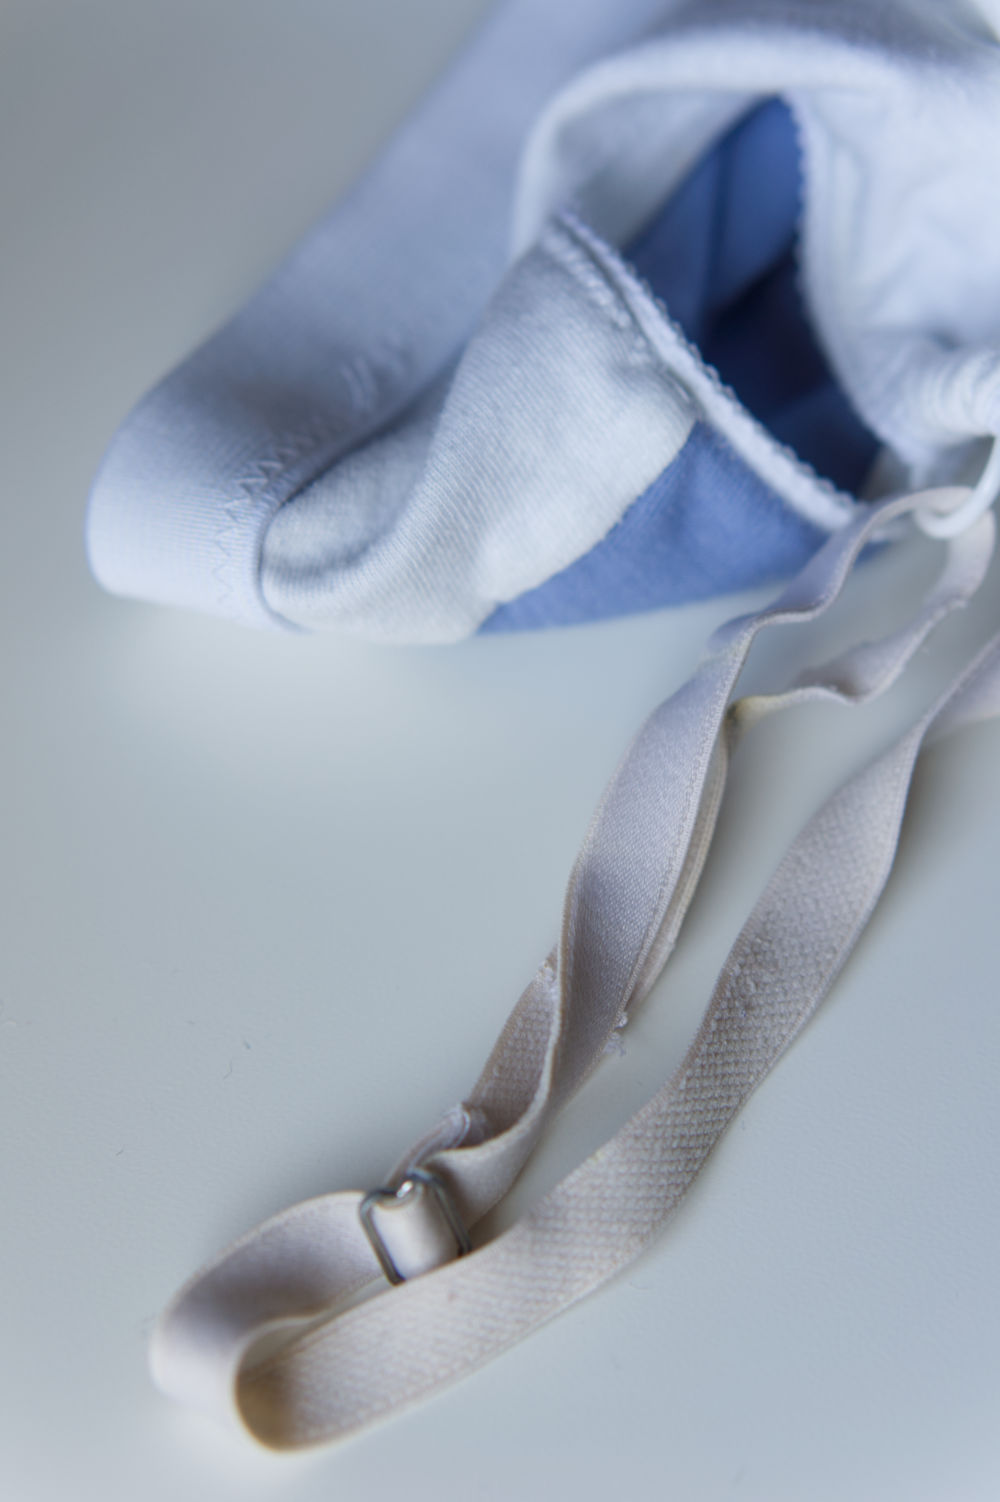
I spent money on the rings: the rings that were on the previous bra were a bit small for the amount of fabric that I had to pass through there so I ended up buying two larger rings. 30 cents each.
I had to buy the elastics, both the band elastic and the picot elastic, there was some leftover but the total amounted to 4,29€.
This means that I made this bralette for: 4,89€.
I know that some brands sell similar bralettes at almost this price, but I try to avoid buying things from fast fashion stores, usually I buy second hand. However, making this is something that makes me happy. I know the solution is not for everyone to make their own clothes – even myself can’t fathom it – I wouldn’t have the mental capacity or time to do it, but it’s nice to know that we have the power to make.
Final result
What do I think about the final result? I LOVE IT! I love how the bralette has two colors, in the beginning I was just trying to make something different but I think that it took the bralette to the next level.
It’s a little bit tight, I don’t notice it right away only after a few hours of wearing it – but here I believe it’s my fault because I cut the elastic a little bit smaller than the pattern suggests because I as afraid it was going to fall off. I think that it’ll be okay after washes and wear.
There is something in the cups that bothers me, there are some bumps in the cups, I don’t know if it’s the fabric that I chose or because I sewed something wrong, but truthfully it doesn’t look too good. Or maybe I just need to cut the cups flatter so they fit my chest better.
Other than the fact that it’s a bit tight, it’s SUPER comfortable, my boobs like right away to be held by the soft fabric of the cotton t-shirts (they were also pretty worn out so that might have helped as well), I really like how it feels in the skin.
I never thought of sharing a picture of me in my bra online but it’s one of the things that I want to see the most when researching if a pattern is right for me. Seeing fotos without it being worn it’s not the same thing, and I searched on the Internet and on Instagram people that made this bralette and posted pictures wearing it.
I hope posting this helps you in some way.
I started writing this thinking I didn’t have much to say but of course I did! Not only I loved the final result but it’s also the reason why I’ve been sewing more lately.
After all said and done, I still think that this is a good project for beginners mainly because it doesn’t have a lot of notions, just elastics. I’d highly recommend signing up for “CreativeBug” to see the class.
(this post has affiliate links)