
Reducing waste in your home is already very difficult, from recycling to buying in bulk, there’s so much to learn, it’s overwhelming!
You start by reducing your plastic at home but you inevitably go out to eat.
Eating out means not having to worry about meal planning and it’s such a good way to unwind with friends and/or with your partner.
I personally love to try out new places, and I do get disappointed but that’s part of life. I’m one of those super picky people at restaurants. If I’m paying, I want nice customer service and good food!
However, when you eat out, you don’t control how your food is served.
You receive disposable utensils, cups, napkins, disposable everything and the only alternative is go somewhere else or not eat.
Not great alternatives. I’m hangry!
Hence why you need an utensil kit in your life. Something that’s always with you that you can quickly take out and use, instead of relying on single use plastic.
A utensil travel kit is also one of the, what I consider to be, essential zero waste items to bring when traveling.
I’ll be very honest with you, this is one of the things I still struggle the most.
It’s hard to be that person refusing disposable spoons. I don’t enjoy being the center of attention. And if you’re on the fence of bringing your utensil kit the next time you’re out, do it just once!
Do it when you’re alone or with someone you’re very comfortable with. I find that’s the easiest way for me to take the first step.
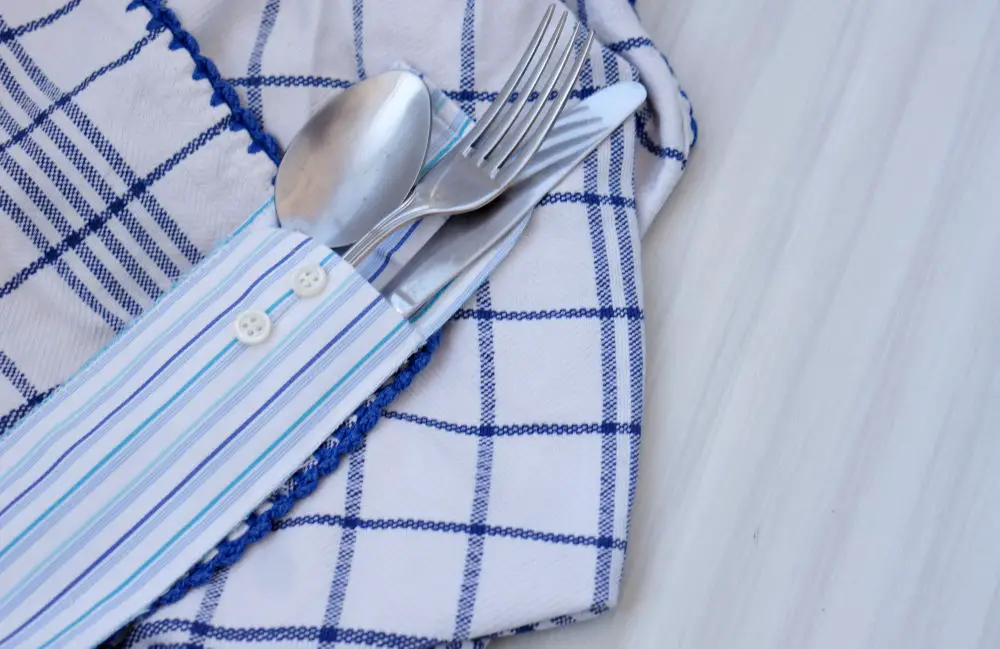
To start off using it, why not create your own cute cutlery pouch?
A simple DIY made with recycled materials – no waste DIYs are the best!
You just need to use the cuff of an old men’s shirt and thread.
How to make DIY utensil travel kit
Materials
- Cuffs from old men’s shirt
- Scissors
- Cotton thread
- Needle
- Sewing machine (optional, if you don’t want to sew by hand)
Instructions
1. Cut off the two cuffs of an old men’s shirt. When cutting you want to make sure you don’t cut any of the corners that are already neatly seamed. That way you only need to sew them together, you won’t need to baste them.
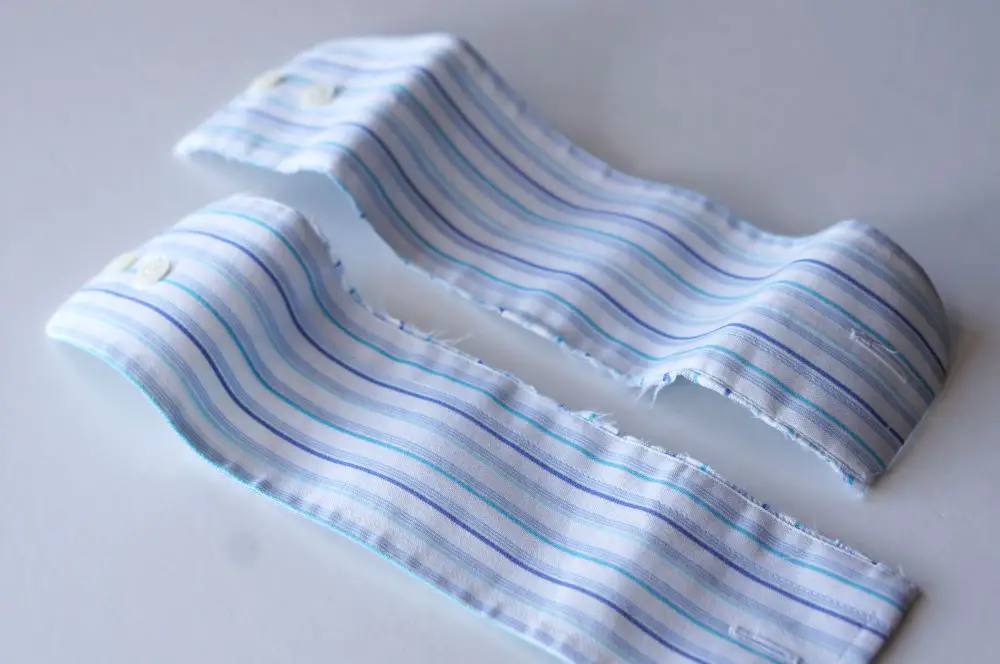
2. Iron the cuffs.
3. Align them with the buttons bands in opposite sides, leaving space to fold the fabric so the button holes can be used. Button up the fabric so you can figure out what’s the best position to sew your fabric. Pin in place to secure the two cuffs.
4. Zig zag stitch in the two lateral sides. Since there’s not a lot of sewing to be done, you can also sew it by hand, using a blanket stitch. You can see the stitching here:
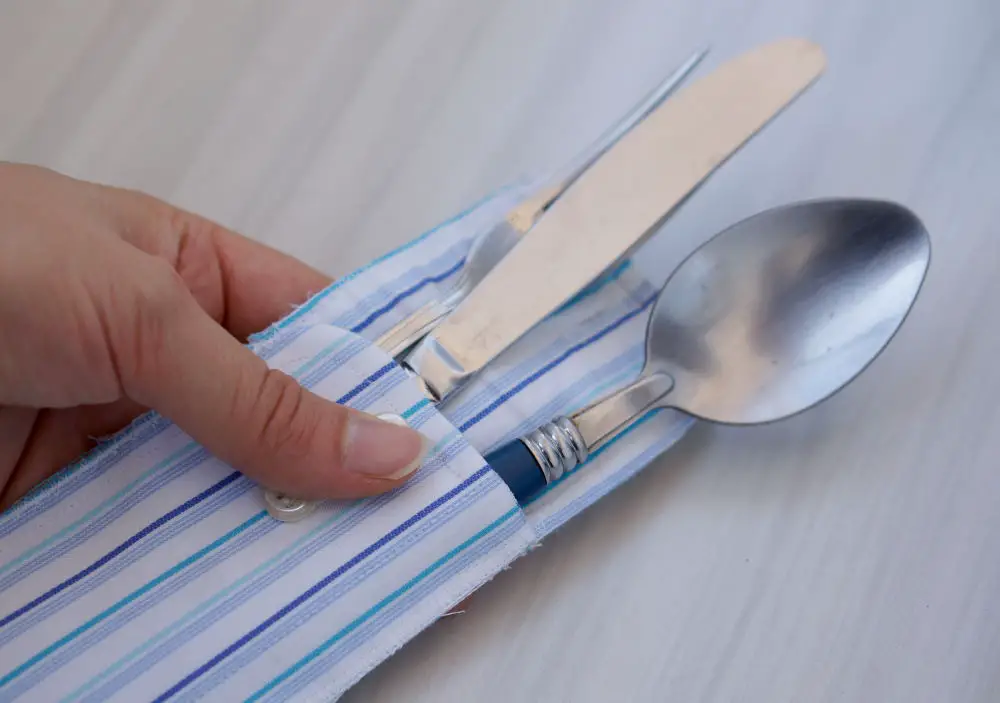
5. Button up the button at the end of your cutlery pouch
6. Insert your utensils, and you’re good to go!
Where to get utensils?
Use utensils that you already have at home! If you really want you can buy bamboo utensils but being zero waste is also about reducing your consumption.
Having said that, if you’re flying, keep in mind that “normal utensils” might be confiscated in security check, investigate this before flying with it in your carry-on.
And here’s how you can make this simple diy travel utensil kit, it’s not hard to do and you don’t need take out your sewing machine to sew it. You can even teach older kids sewing with blanket stitch, so they can have their own kit when traveling or going in a picnic.